Saturday, December 24, 2011

The Big Cookie Project: Week 35

Happy Birthday Jesus!

That was my goal this week, to make a birthday cake for Jesus. I've been struggling with trying to explain to Nolan how Christmas and the birth of Christ coincide with each other. My sister had to break it down for me like this:

"Saint Nick loved giving presents to good children all year-round. He got so busy with so many gifts that he decided to only do it once a year. He chose the most special day of all...Jesus' birthday."

I've never done a cake for Jesus' birthday before, so off to the internet I went to look for a good recipe. Most of the cakes I found were knee-deep in symbolism, which I thought would go straight over Nolan's head. So, I went with a Chocolate Chip Pound Cake Recipe. I thought the process of just making the cake for Jesus would be a good experience for Nolan this year. Next year, we'll try the other ones. Recipe:

Ingredients:

1 cup butter, softened

2 cups sugar

4 eggs

2 tsp. vanilla

3 cups flour

1/2 tsp. baking soda

1/2 tsp. baking powder

1/4 tsp. salt

3/4 cup buttermilk (I used whole milk, that's all I had, and it worked)

1 (12oz.) pkg. semisweet chocolate chips

1/2 cup peanut butter


Directions:

1. Preheat oven to 325 degrees F and grease and flour a 12-cup bundt pan. In a large bowl, mix together the sugar and butter until fluffy. Add the eggs, one at a time. Add baking powder, baking soda, and salt. Alternate adding the flour and buttermilk. For example, add 1 cup flour, mix well, then add 1/4 cup buttermilk and mix well. Keep on alternating until you've added all the flour and buttermilk required.

2. Fold in 1 cup of chocolate chips and bake for 55-75 minutes, until golden brown and a toothpick comes out clean.

3. After the cake is done, out of the bundt pan and cooled, use a microwave-safe bowl and add the rest of the chocolate chips and the 1/2 cup peanut butter. Microwave for 30 seconds and stir. Keep on microwaving for small incriments until the peanut butter and chocolate are totally combined. Use as icing for your cake!

Here's Nolan with our bundt cake pre-icing. It was this super detailed castle bundt pan that Greg got on clearance for $1 at HEB. Not a typo....$1!!!!


Nolan drizzling the icing over the castle.


Our finished product (I smoothed out the icing as best I could). Nolan had a good time making this cake in honor of Jesus. He was even trying to convince me to buy Jesus a pair of shoes at Target. It was hard explaining that Jesus really didn't need a pair of shoes, all Jesus wanted was for Nolan to love Him and love others. We've had quite a few interesting conversations this week.


Have a Merry Christmas, enjoy your family, and of course enjoy some baking!

Sunday, December 18, 2011

The Big Cookie Project: Week 34

I'm eating one of my cookies for this week as I type. To be totally honest, I think I've had close to five since they came out of the oven. They were too good, I couldn't help myself. They are reminiscent of my favorite kind of sandwich, a classic peanut butter and jelly. I think I ate pb&j sandwiches almost every day when I was pregnant with Nolan. Perfect combination in my opinion, whoever thought of this pairing is a genius in my book.
They are called Peanut Butter and Jelly Cookies( a little obvious, I know)
Recipe:
Ingredients:
1 cup sugar, plus more for rolling dough balls
1 cup crisco
1 cup firmly packed brown sugar
1 cup smooth peanut butter (I used 1/2 cup chunky pb, b/c I ran out of smooth)
2 eggs
1/4 cup milk
2 teaspoons vanilla extract
3 1/2 cups all-purpose flour
2 teaspoons baking soda
1 teaspoon salt
Jam, Jelly or Preserves of your choice

Directions:
1. Cream sugar, crisco and brown sugar in a blender. Add peanut butter, milk, eggs and dry ingredients until smooth
2. Roll in to balls, roll ball in to sugar
3. Bake at 375 degrees F for 7 minutes, take out of oven. Use a teaspoon to make an indention on top of cookie, then take 1/2 teaspoon of preserves and place in indention. Bake for another 2 minutes in the oven.
4. Cool completely on wire rack.


I felt like this recipe made quite a few cookies. That's okay, because I'm packaging them up tomorrow for gifts for my 2's class at school. I think they'll like them. Let's hope no one is allergic to peanut butter....or strawberries....haha:)

Sunday, December 11, 2011

The Big Cookie Project: Week 33

Gingerbread time! I've been planning to make a gingerbread cookie in December ever since I started this project. The search was on for the perfect cookie recipe. Martha Stewart came to my rescue!


This is a picture of the outcome of the cookies that Martha Stewart made. Greg was doubtful on how they would turn out. He spent quite a lot of time trying to convince me to buy boxed mix, but I was set on making it from scratch. I then realized why he was trying to convince me, spices are expensive! We tried to buy as many off-brand spices as possible, but one spice was over $4! That hurt a little. If you want to save money, go to a store that sells spice in bulk and only buy what the recipe requires. That will save you a ton of money. We ended up not doing that b/c it was all the way across town and we were short on time. Here's the recipe:

Ingredients:

5 1/2 cups all-purpose flour, plus more for work station

1 teaspoon baking soda

1 1/2 tsp. salt

4 tsp. ground ginger

4 tsp. ground cinnamon

1 1/2 tsp. ground cloves

1 tsp. ground nutmeg

1 cup (2 sticks) butter

2 large eggs

1 1/2 cups molasses

Royal icing (for decorating)

Directions:

1. Mix butter and brown sugar in an electric mixer on medium speed until fluffy. Add eggs and molasses and mix until combined. Add flour, spices, baking soda and salt and mix on low until combined. Divide dough in to thirds, wrap in plastic and chill for 1 hour.

2. Roll dough out on to generously floured counter until dough is just under 1/4 inch thick. Cut out shapes, place on cookie sheets and then place the cookie sheet in to freezer for 15 minutes, until firm.

3. Bake cookies in a 350 degrees F oven for 12 to 14 minutes, or until crisp but not darkened. Transfer cookies to wire racks to cool completely.

4. Place icing in a pastry bag fitted with a small plain tip. Pipe designs on to the cut-out cookies, immediately sprinkle with sanding sugar. Store cookies in an airtight container at room temperature up to 1 week.

***A few things I changed: instead of using molasses, I used dark corn syrup b/c that's all I had in the pantry (Step 1). I used a ziploc bag with a corner snipped off as my icing bag instead of a pastry bag (Step 4). I sprinkled some of my cookies with sugar. The sugar was sticking nicely to the icing, but also sticking too well to the actual cookie. And I was making a mess in my kitchen, so I stopped sprinkling with sugar.


Here's my dough divided in to three equal parts...well not really equal. More like Papa, Mama and Baby Gingerbread :)Nolan helped me cut out all the shapes...we tried to stick with Christmas theme, but a few dinosaurs and trucks snuck in there.Here's all the cookies, it fixed A LOT!

The end product! Probably not as nice as Martha Stewart, but I'm still happy with them.

Hope the people at the Cookie Exchange like them too!

Friday, December 9, 2011

Winter Wonderland...a myth?

I think every Texan has the same fantasy in the dog-days of summer... their house and lawn covered in powdery snow while a fire is roaring in the background. You sit by your large window sipping hot cocoa or tea (whichever you prefer) and watch the kids frolic in the winter wonderland. I think I gave in to this fantasy ALL summer long with so many days topping 100 degrees. I always imagine this majestic landscape and maybe even a deer running through the neighborhood. I don't know why I imagine a deer, it just fits in with my "Winter Wonderland" mindset.


And then, it actually happens, it starts getting cooler outside!! I start getting prepared, buy some fire starter logs and stock up on my hot cocoa. Sadly, though my fantasy hits a snag and I remember I live in Texas where it MIGHT snow once all winter and where winter isn't as fun as I imagined it all summer long. I'd like to share some things that have already put a damper on my winter:


1. Cold hands and feet. It seems as though my extremeties cannot hold any body heat. If I could wear mittens around the house without looking crazy, I think I would.


2. Cold bathrooms. Cold toilet seats. Cold bathroom floors. Cold water in the showers. Enough said.


3. Actually having to GO OUT in the cold. I think the bear population had a great idea with the whole "hibernation" thing. It sucks to go outside when its cold and wait in your car for it to warm up.


4. Winter clothing: When you have on 3 layers everyone looks a little chubbier


5. My idea of snuggling by the fireplace hasn't happened yet, and we've already had quite a few freezing nights.


Granted, I think the only reason we got through summer was our anticipation of winter. But now that winter is here (I hate to admit this) I am sort of, just a TINY bit, looking forward to warmer temperatures. Of course, winter does have it's benefits. It wouldn't be the same looking at Christmas lights, sitting by a fire, or sipping hot cocoa if it were 80 degrees outside.


Here's to hoping that you have your "Winter Wonderland" that you've been dreaming about all summer come true. For me, I'll keep on dreaming :)

Friday, December 2, 2011

The Big Cookie Project: Week 32

I admit it. I am having chocolate chip withdrawl. It has been a few weeks where I have not made any cookie with any kind of chocolate in it, and it's killing me! I have left up the cookie choosing to Greg on Thursdays, because he does the grocery shopping that day and gets whatever I need for the recipe. He is not a fan of multiple chocolates in a cookie, but I LOVE it. My idea for this week was a "5 Chip Cookie". Doesn't that sound delicious?? 5 different kinds of chips! That ideas was shot down pretty quickly and Pecan Sandies were chosen this week. To compensate my chocolate chip craving, I ate a handful of M&Ms while making these cookies. I know, pathetic, but please don't judge my chocolate addiction :)

Pecan Sandies Recipe:

Ingredients:

1/3 cup butter, softened

1/3 cup shortening

1/2 cup sugar

1/2 cup brown sugar

1 egg

1 teaspoon vanilla extract

1 1/2 cups self-rising flour

1/2 cup chopped pecans


Directions:

1. Cream the butter, shortening, sugar and brown sugar together in a mixture at medium speed. Add egg and then the dry ingredients.

2. Mix in by hand the pecans.

3. Drop by spoonful on to cookie sheet. Bake at 375 degrees F for 10-12 minutes

4. Let cool on rack


They turned out a little flatter than I expected, but still yummy. Greg likes them, but he is a fan with anything that has pecans in them. If you don't have self-rising flour just use regular flour and add 1 1/2 tsp. baking soda and 1/2 teaspoon salt. Viola! You have your own self-rising flour.


Happy Baking!!


PS...Had to add this picture of Mallory who was "smiling" for me. Doesn't really look like smiling, more of an angry grimace where she is trying to show me every single tooth in her mouth. We'll have to work on it, but she's still pretty darn cute. Too funny!


Tuesday, November 22, 2011

Pinterest EXPLOSION!

Now that it's cold outside (finally!) I'm getting the urge to lock myself inside and be all crafty. I have been giving Pinterest a little peek and getting a few ideas, so I decided one of our walls needed a little updating. I already had quite a few black 8x10 frames, so all I bought was some canvas. Here is the product:


I painted all the states that we have been born in. I was born in Maryland, Greg was born in Missouri and the kids were born in Texas. If you look closely (please don't), my lettering is pretty horrible because I don't own an X-acto knife and was having a hard time cutting out letters to use as a template. Instead of cutting, I tried to free-hand it and it turned out okay. After looking at them for way too long, if I had it all to do again, I would probably leave out the state names and just put the outlines of the states. But the paints already dry, and I'm not doing it again!
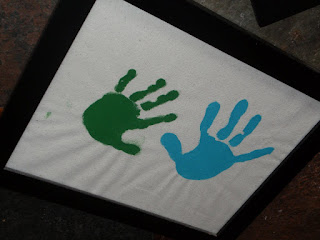
To keep it symmetrical, I needed one more frame to go horizontal. I decided to do the kid's handprints. It was hard doing their handprints perfect, so I went back and touched it up. Looks much better the second time around.


I made a big "J" out of buttons. I WAS going to sew them on, but then I laid out the buttons and saw there were a ton of them. I decided to bust out the super glue. It went much faster, but got a lot of glue on my fingers. It was a very "sticky" situation....hahahaha!Finished product with the artwork that I painted/glued.Then I decided to throw in some black frames. To keep the pattern correct I had to turn the picture of Nolan sideways. Don't fret, it won't stay that way. I'm thinking of putting some black and white photos of our trip to Germany on the left and right to elongate the picture area. Maybe another day....

The Big Cookie Project: Week 31

Turk(ish) Cookies!! Do you like my play on words? Well, it's not really a play on words but close enough. I thought of making cookies that looked like turkeys to celebrate Thanksgiving, but instead I made cookies that were FROM Turkey! I don't know if people from Turkey have any knowledge of Thanksgiving, but I'm definitely using one of their recipes to celebrate Thanksgiving in Texas. So then I started looking for Turkish cookie recipes and found a shortbread recipe. The reason I chose it was because it had an ingredient that I don't think I've ever used in cookies before...corn starch?!?! Here's the recipe:
Ingredients:

400 grams butter/margarine at room temperature (I did the conversion and it's about 3 1/2 sticks)

9-10 Tbsp. powdered sugar

1 Tbsp. vanilla

3 cups corn starch

2 cups all purpose flour

1/2 cup powdered sugar for top (optional)

Directions:

1. Take powdered sugar and soft butter/margarine in a large bowl and mix. Add starch slowly

2. Add vanilla and flour. Mx until dough becomes smooth and soft

3. Grab large pieces of dough and roll in to a ball, place on cookie sheet and gently press down.

4. Bake at 350 degrees F for 15-20 minutes. Dust with powdered sugar when they come out of the oven.


When making these cookies in to balls it reminded me of the "Corn Starch Experiment". If you've ever done it in school, the whole thing is that when you mix corn starch and water it becomes this liquid that when you apply pressure to, it seems solid; but when you reduce the pressure it seems to turn in to a liquid again. When I was finished with the dough, it seemed very crumbly and I thought making the balls would be a disaster. But just like the experiment, after I applied pressure to make the balls, they magically came together and formed a solid ball!


After I dusted them, I couldn't wait for them to cool and see if they would taste delicious or gross. They were really good! The only downfall to this cookie is that it is very dry and sucks the moisture out of your mouth. Definitely have a drink close at hand! All in all, I give them two thumbs up.


Enjoy your Turk(ish) Cookies for Thanksgiving!

Saturday, November 19, 2011

The Big Cookie Project: Week 30

Yay for Lemony Sour-Cream Cookies! These turned out really well this week and have a hint of lemon flavor, but is not overwhelming. The only problem I ran in to was that the recipe asked for freshly grated lemon peel. Apparently, I have no clue how to grate a lemon peel. We have one of those graters with four sides and four different sizes of grates. I used every single side to try and grate some lemon, but had no success. After a few minutes of struggling, I finally just cut off a chunk of peel and tried to dice it as small as possible. I must be handicapped in the "zesting" department. If you look hard enough you can see a large chunk of peel that I didn't chop small enough, but added great flavor when I bit in to it.
Also, if you are looking for a cookie without eggs, this is the recipe for you. The sour cream in the recipe gives it that extra moisture and was a good replacement. Here's the recipe:
LEMONY SOUR-CREAM COOKIES:
Ingredients:
1 cup all-purpose flour
1/4 teaspoon baking soda
1/4 teaspoon salt
6 Tablespoons butter or margarine, softened
1/2 cup sugar
1/2 cup sour cream
1 teaspoon freshly grated lemon peel
1/2 teaspoon vanilla extract

Directions:
1. Preheat oven to 350 degrees F. In small bowl combine flour, baking soda and salt.
2. In large bowl, beat butter until creamy. Gradually add sugar and beat until light and fluffy. Beat in sour cream, lemon peel and vanilla. Beat in flour mixture just until blended.
3. Drop dough by rounded teaspoons, 1 inch apart. Bake until cookies are set and edges are golden, 1o to 12 minutes. Cool on a cookie sheet.
4. Repeat with remaining dough

I bet these cookies would go great with a cup of hot tea, but since I am not a hot tea drinker someone else might have to try that out for me. Enjoy, and I hope you have a better time grating than I did!

Sunday, November 13, 2011

My Pumpkin Turkey

I don't know about you, but after Halloween I was pumkin-ed out. We carved pumpkins, painted pumpkins, ate pumpkin seeds, I even crocheted pumpkins as a table centerpiece. Now that we are officially past October 31st and quickly approaching Turkey Day, I needed a cute turkey project. The only problem was I had little pumpkins laying around, which are still perfectly good and I didn't want to trash them yet. So, I came up with the Pumpkin Turkey! (probably not an original idea, but still cute!) Here's my template that I drew for the feathers and the turkey's body. I drew five feathers, but you could definitely do more.

Here is the finished product. I asked Nolan what he was thankful for, I colored the feathers (next time I'll let him color) and then cut everything out. I was contemplating on how to get the feathers on to the pumpkin and went with bamboo skewers we had laying around the house. I divided one skewer in to three parts and started shoving them into the pumpkin. I only used 2 skewers, so I will have plenty left for actual food products.

Then, I just taped the feathers to skewers and there you have it, a Pumpking Turkey! The only downfall is that he is not super cut from the backside, but that's okay. Here are the five things Nolan was thankful for:

1. Toys...of course

2. my sister...the only real person he named, very touching and cute. Eventhough he asked to trade in Mallory for a new sister, because the one he has is too loud for him.

3. Race Car Plane and Man...a toy he got. A little airplane with action figure that goes SUPER FAST!

4. Dragons...because they definitely exist :)

5. Mouseketeer Movie...a movie we just finished watching, and he wanted to watch again immediately.


Enjoy and Happy Turkey Day in 10 days!


The Big Cookie Project: Week 29

We'll have to record this week as a big fail. I've made these cookies before, and they just didn't seem to come out right, so I thought that maybe I would give it a shot for the Big Cookie Project.
This recipe goes WAY BACK. When I was in first grade and studying dinosaurs, our teacher had us practice our writing by writing a recipe. The title of the cookie recipe was "Dinosaur Droppings" (I don't know who would ever name a cookie that, because it makes it sound so unappetizing and sort of gross). Some of the ingredients were "crushed bone" aka sugar. It really kept with the whole dinosaur theme.
I had no recollection of writing this recipe until a while back I found it in a drawer and realized my mom had kept it all these years! We made the cookies and they turned out great. Well...time passed and I was wondering what the recipe was. My mom finally lost the "Dinosaur Droppings" recipe, so I was left to find the recipe online. It's not that the cookies taste bad, they actually taste okay, but they don't get firm. I don't know what I'm doing wrong, but I'm pretty sure they aren't supposed to stay in a sad little clump that I can't peel off the wax paper. Maybe you'll have better luck...
"Chocolate Oatmeal No-Bake Cookies"
Ingredients"
1 stick butter
2 cups sugar
1/2 cup cocoa powder
1/2 cup milk
1/2 cup smooth peanut butter
3 cups instant oats
1 tsp. vanilla
Directions:
1. Combine butter, sugar, cocoa powder and milk in a large saucepan and heat to a low boil. Stir until mixture is smooth.
2. Remove from heat and add peanut butter, vanilla and oats.
3. Drop by tablespoonful on wax paper to let harden up. Can be stored in a containter in the refrigerator.

This is the picture after just adding in the oats. I have to admit, it sort of does look like dino poop...or atleast what I imagine what dino poop would look like :)This is the final step after dropping them on to the wax paper. I had such a hard time getting a clear picture of the cookie. It was almost as if they were saying, "No, I'm ugly! You can do better!"
I'm thinking maybe I didn't boil the mixture long enough. This will bug me until I figure it out. If you have a solution or a recipe that works, I'd love to hear it. Good luck and happy baking!


Sunday, November 6, 2011

The Big Cookie Project: Week 28

This weekend my mom got to come in to town and visit and I was trying to think of a trademark cookie that my mom fixes that we could do together. She doesn't do a lot of cookies, but she does do these delicious candies called Heath Saltines that we have also dubbed "Christmas Candy". The reason we call it that is because she only makes it one time a year around Christmas, and it goes so fast she can't keep it stocked in the house. By no means is it near Christmas yet, but I'm all in the cheery spirit with cooler weather and with every store carrying lights and decorations. Here is the recipe:

HEATH SALTINES

Ingredients:

1 cup butter

1 cup brown sugar

1 sleeve saltines

12 oz. bag of chocolate chips

Directions:

1. Line pan and sides with foil, grease with butter and make a single layer of saltine crackers on the bottom.

2. Cook butter and brown sugar over medium heat until it becomes caramelized (when it coats the spoon and doesn't run off)

3. Pour over crackers and bake at 350 degrees F for 5-7 minutes. If some crackers "float" in the butter, just push them down.

4. Pour 12 oz. bag of chocolate chips and stick back in the turned-off oven, about 6 minutes, or leave them in until they melt. Spread chocolate layer and refrigerate.

5. When completely cool, break in to pieces


This picture above is after baking the crackers and putting on the chocolate chips. I then put the pan back in to the oven until the chocolate chips are melted.This is the finished product. Instead of refrigerating, I freeze the candy. It seems to be a bit crunchier after freezing, which is how our family eats it.


I've been eating WAY too many of these. Every time I pass the freezer, I break off a piece and eat it quickly before the chocolate starts to melt. I think the best part of this candy is that since the bottom layer is toffee-like, I pick up one piece and three have been stuck together. Maybe that's why it's going so fast, I'm not eating just one tiny piece, but whole chunks at a time.


We had a fun time making it and eating some pieces while watching a movie. That was the best part, doing it together and ushering in the holiday season with a little treat!

Friday, November 4, 2011

The Rhyme Crime


After reading Dr. Seuss since the day Nolan came home, he is finally trying to put rhyming words together. The first time he said,"cat rhymes with hat!" I thought, "He's a genius," and the next rhyming words were something like "booger rhymes with foot"....mmm...not so much. So, we are a work in progress but atleast he's trying new words.


Most of the time, his combinations were really cute, sometimes funny, but he took a wrong turn today.


We were in the car driving home from visiting Greg at HEB and he was trying to rhyme words and he said,"Stuck, F*ck, does that rhyme?" AAAHHHH!!!! With the biggest effort ever, I tried not to flip out as he kept on repeating the curse word saying,"Yes, that does rhyme, but we NEVER say that word."

Nolan: "Why?"


Me: "You don't say it, it's a curse word, it makes us sad when you say it."

Nolan: "Why?"


Me: "Have you ever heard me or daddy say that word?" (me crossing my fingers that he would say no)


Nolan: "No, but why?"


Well...I really don't know exactly why. I curse word is just a word but used in the right tone and context it sounds so horrible. I gotta give credit to Nolan, that was the happiest curse word I have EVER heard come out of anyone's mouth. All I could do was laugh under my breath the rest of the way home from the word mix-up.


In the end, I'm hoping that he will keep on rhyming, but leave the dirty words out, or atleast only in earshot of me where I can catch them first.

Friday, October 28, 2011

The Big Cookie Project: Week 27

I know two wrongs don't make a right, but hopefully in the baking world, two baked goods that both break my "rules" can equal one cookie for the week. My first "rule break" are these Lemon Bars. I made them for a Ladies Night, and gave some extra to Greg's work friends. He came home and said that they would like some more, so I have made two batches of these this week. Even though I said in one of my first blogs that I wasn't going to do any bar-baked goods, I decided that this might equal 1/2 of the cookie for this week. I hope that works for you :)


These Lemon Bars are courtesy of Paula Deen. If you don't know who Paula is, her motto should be, "the more butter, the better." I would have to agree with her, atleast in the baking world. I've never made Lemon Bars before, so I think my first batch was a little over-done because I didn't know they were supposed to be squishy in the center, I just thought they weren't done cooking. My second batch was much squishy-er in the middle, which is more on target of what a Lemon Bar should look like. Here's the recipe:

Ingredients:

Crust:

2 cups flour

1 cup confectioner's sugar

Pinch salt

2 sticks butter

Filling:

4 eggs

2 cups granulated sugar

6 Tablespoons flour

6 Tablespoons fresh lemon juice

Directions:

1. Preheat oven to 350 degrees F. Lightly grease a 9x13 pan

2. Make the crust by combining the flour and confectioner's sugar. Cut the butter in tabs and mix in with your hands to make a crumbly mixture.Press the mixture in to the bottom of the pan and bake for 20 minutes.

3. While the crust is baking, make the custard. Combine all the ingredients and whisk until all incorporated. Pour it over the baked crust and bake another 25 minutes longer. Sprinkle with confectioner's sugar if desired, when completely cooled.

My next 1/2 of the Big Cookie Project this week was to make my last Fall Cookie. I decided to use a sugar cookie recipe that I have already used (hence this cookie only counting as 1/2 because it broke the rules). The only fall object that I could think of was candy corn, so I made them in to cookie form! I divided my sugar cookie dough in to 3 equal parts. I dyed one part yellow, 1 part orange, and then 1 part I didn't do any thing to it. I rolled them out in to equal lengths. Squished them together and made them stick together with a little water. Then, I rolled them out as one big section.
I then took a big chef knife and started making triangles. The top and bottom colors reverse every cookie, but it doesn't bother me too much.Here is the end product. The yellow turned out more vibrant after baking, which I was glad about, because you could barely see the yellow when I was dying the dough. I think they turned out really cute, and now this gets me off the hook of having to decorate them with icing, which I am super bad at. They taste pretty good too, but they are not the size of real candy corns, so I am having to tell myself that the number of candies in one serving of candy corn candies is not equal to the same number of cookies. I hope their not all gone by morning!


Saturday, October 22, 2011

The Big Cookie Project: Week 26

Halfway there!! I can't believe I've spent half a year baking cookies on a weekly basis...and eating them just as fast.


I thought a good fall cookie would be great for the cooler temperatures outside. I typed in "fall cookies" on google, and these leaves and acorns popped up that were decorated very intricately. I don't know if I'm that good yet, so I asked my next go-to person, Greg. I told Greg I wanted a cookie that said, "It's fall outside!" I don't know if he got the concept of that, because he chose a Coconut Macaroon Cookie. I don't think they say anything about fall, more like,"Summer is here!" I made them anyways.
They were super easy, only a few ingredients.
COCONUT MACAROONS
Ingredients:
3/4 cup sugar
2 1/2 cups unsweetened shredded coconut
2 large egg whites
1 teaspoon vanilla extract
Pinch of salt
***If you use SWEETENED shredded coconut, reduce the sugar from 3/4 cup to a 1 tablespoon
Directions:
1. Preheat oven to 325 degrees F
2. Combine sugar, coconut, egg whites, vanilla and salt in a bowl. Mix well, completely combining ingredients.
3. Use a 1 1/2 tablespoons to form mounds, place on baking sheet, spacing about 1 inch apart.
4. Bake until golden brown, about 16 to 17 minutes

These were very quick and easy. It was also nice because I fit them all on one pan. I knew they weren't going to spread, just bake in the spot I put them, so I put them pretty close together. The two things that I changed from the recipe:
1. I used a little ice cream scoop to do the balls, you could even use a melon baller. It seemed to help pack the balls tighter.
2. I cooked them a lot longer than 17 minutes. I waited until they were brown on top, and they turned out just fine. I think they would have been underdone if I had only cooked them for the allotted time.
I hope you enjoy this "fall" cookie...haha. I'm hoping to pick a better cookie next week that fits with the weather.

Friday, October 14, 2011

The Big Cookie Project: Week 25

I have something to admit...at work when the 2 year olds eat their lunch, I'm a little jealous. There is a sea of Capri Suns, pb&j sandwiches lovingly cut out in to fun shapes, fruit peeled and sliced and ALWAYS a little treat in there. I remember with clarity that my lunches growing up did not resemble anything like this, my kid's lunches don't even look like that now. This past Thursday, one little girl had a delicious looking Reese's Peanut Butter Cup. I coveted her peanute butter cup, sad to admit, but it looked yummy! It ended up being eaten, but the seed was planted...I went home knowing that my next cookie had to contain Reese's Peanut Butter Cups. After doing a quick google search, I found the perfect recipe: Reeses'-Stuffed Chocolate Chip Cookies! Does such a delicious thing exist? Apparently, yes. This one baker is known for putting things IN TO cookie dough, such as: peanut butter cups, rolos and even oreos (I think that one is definitely on the to-do list soon). After looking over the recipe, I was totally on board. I just had to make a quick run to the grocery store and get the ingredients. The only change I made to the recipe was that they asked for full-size peanut butter cups, but instead I used the fun-size. The recipe was supposed to yield 12 cookies with the full-size cups, but I got 18 cookies using the fun-size. Here are some pictures, step by step and the recipe follows.


This is Step One where you put the chocolate chip cookie dough foundation

Step Two: Add the peanut butter cup. Press securely in to the base


Step Three: Add the top layer of cookie dough. Sorry for this blurry picture, it focused on the back cookies instead of the closest one.


Step Four: Cookies are baked and I cut one in half to show you the middle and how the peanut butter cup cooks down inside the cookie.

Recipe:

Ingredients:

1/2 cup butter (1 stick) Room temperature

1/2 cup chunky peanut butter

1/2 cup white sugar

1/2 cup brown sugar

1 large egg

1 1/4 cups all-purpose flour

1/2 teaspoon baking powder

1/2 teaspoon baking soda

1/4 teaspoon salt

1 cup chocolate chips

12 full-sized Reese's Peanut Butter Cups (I used 18 mini cups)


Directions:

1. Cream together butter, peanut butter and sugars. Add egg and add dry ingredients just until the dry ingredients are incorporated. Stir in 1 cup of chocolate chips.

2. Scoop out a heaping Tablespoonful of dough and place it on your cookie sheet. Smash it down a bit. Top with a Reese's Peanut Butter cup. Then top with another heaping Tablespoonful of dough. Repeat with remaining dough and PB cups.

3. Bake at 350 degrees F. for about 12 minutes, until cookies are lightly browned and almost set.


They were actually fairly easy to do, nothing really complicated about it. The one thing you SHOULDN'T do is add up the calories in this stuffed cookie. By no means are these light cookies, so just enjoy now and worry later.

Enjoy them with a big glass of milk and they are perfect!

PS. This last picture is of Mallory at the playground. She has finally reached the age of playing on the equipment without me hovering. It makes me happy and worried at the same time.

Wednesday, October 12, 2011

First Dentist Appointment: Check!

So, since I couldn't remember the last time that I've had my teeth cleaned I thought it might be about time to schedule an appointment. And now since Nolan has quite a few teeth, he got to go to his first dental cleaning! We were lucky enough to go see my sister Jenn. As you can see from the pictures, Nolan had a blast.All gloved up and ready to assist in my teeth cleaning!
He did the "sucker" part, or that's atleast what I call it. It sucks the water out of your mouth.
He liked to also use the water tool. There was a little water squirting going on, but I thought he practiced quite a lot of restraint with the water-squirter.

Nolans' teeth getting checked out...


After we were done, he said it was,"awesome". I think we might have a little

dentist on our hands.


His lollipop from his appointment is eaten, his Transformers sticker is stuck securely to the wall and he even got a lunch out with Jenn for being a great assistant. A great day in my book!

Friday, October 7, 2011

The Big Cookie Project: Week 24

Hello, again! This is my first cookie that contains raisins. Let me share with you on what I think about raisins:

I don't know what it is about raisins, but they seem so yucky to me. The premise of a raisin is that you leave a perfectly good grape outside and then let it bake in the sun and shrivel up to a tenth of its size...then you have a raisin! I've never really enjoyed them, maybe because of all their wrinkles and distinct smell. I was trying to think of another fruit that we do that to and couldn't come up with any. When bananas in our house start to shrivel and turn brown, their next home is the trash can. The same goes for all the other fruit that comes in to our refrigerator. I know of their health elements, the kids like them, but I choose not to participate in their grape-eating.
Then, why did I make these cookies? Special request, and since I like her so much I did it! Atleat I won't be sneaking any of these in the middle of the night for a snack.
Am I crazy and the only one who feels this way? I think Greg might think so.
Here's the recipe:


OATMEAL RAISIN COOKIES


Ingredients:


3 cups old-fashioned rolled oats


1 cup plus 2 tablespoons all-purpose flour


1/2 cup toasted wheat germ


1 teaspoon baking soda


1 teaspoon baking powder


1/2 teaspoon ground cinnamon


1/2 teaspoon coarse salt


1 cup (2 sticks) unsalted butter


1 cup packed light brown sugar


2 large eggs


1 teaspoon pure vanilla extract


1 1/2 cups raisins


Directions:


1. Preheat oven to 350 degrees F. Stir together oats, flour, wheat germ, baking soda, baking powder, cinnamon and salt in a large bowl.


2. Cream butter and sugars together in a mixer. Mix in eggs and vanilla. Mix in dry ingredients. Mix in oats and raisins by hand


3. Drop dough on to baking sheet spacing 2 inches apart. Bake until golden, about 12 minutes. Let cool on sheets.


The one thing I do admit about these cookies is that they make the house smell good with the cinnamon. And the do look very pretty when they are done.


I hope you are a raisin lover!

Tuesday, October 4, 2011

Attitude is EVERYTHING!

I know this isn't a cookie recipe, but it will be coming in a few days.
I just wanted to take a moment and brag on two people that gave me the best customer service two days in a row!
Scenario #1: We were headed home from Houston and wanted to stop at the outlet mall, but we were tight on time and had only 30 minutes before the store closed. We ran in with both kids, Greg made a straight shot to the shoe that he wanted and ran in to our first customer service guy. Greg started rambling on what he wanted, and the guy said, "Stop, slow down and take a deep breath." I almost had to laugh at this comment because we did look a bit frazzled. He was really quick with Greg and asked me if I needed anything. No, but why not look? He gave me some shoes that fit my requirements "comfy and look good with jeans". When he brought them out I said,"Ok, you're going to be mad, but I think I need a 10 instead of a 9 1/2 (I know, I have huge feet)." Then, he held up a 10 that he had brought...he must have been psychic. His choice was right-on and his upbeat attitude was great even though they should have been closing up. We ended up buying both pairs. It made our day, and even talked on the way home how great it was to receive good service instead of complain about yet another waiter/bagger/checker/etc.
Scenario #2: Let's just start off by saying I LOVE SONIC HAPPY HOUR! Apparently, every one in Bryan does too, because it was packed. It was one of those days where my reward was a drink, and the kids even got one too (don't judge too harshly, it was only powerade). We pulled up, ordered and we got our drink from a guy on rollerskates, LOVE IT! I gave him the money and he was so nice I almost wanted to tip him more for no real reason other than him being cheerful. Then, he asked if I wanted mints, ummm, of course. Instead of just one, he gave me a whole handful. He must have seen it as a small gesture, but I thought, "How nice." I went home with a smile AND a delicious half-off drink. Made my day.
I know these guys will never read this blog, but just wanted to give a positive story in a world of sour moods. It's rare where you find good customer service, even though in the back of my mind I'm thinking, "Your job is to Serve the Customer. Why can't you be nice to me?" I know I have been guilty of this myself, but I am so glad these guys did their job with a smile and a good mood. It really gave ME a better attitude towards my kids at work and at home. I think I'll be doing this more for other people :)

Monday, October 3, 2011

Crochet MADNESS

With the weather cooling down for fall, the yarn and crochet hook have been calling my name. I started on Christmas gifts as well hats and stuff around the house. I guess you can call it "Crochet Madness" around the house....much like March Madness, but instead of basketball, there is crocheting. Here are some things that I have completed as well as some things that are on my To-Do list.


Mallory's earflap hat with flower. It's too big for her head, but I'm guessing her head will grow.

Also, have done a monster hat for Nolan

and a dragon hat. Not picture...too lazy to download them to the computer.

Here's a doll that I want to do for Mallory. I think I'll be starting it after I stop typing...can't do both at the same time...haha


A rocket ship for Nolan needs to be done. We have sadly moved on from trains to rocket ships and space. I have not packed up Thomas yet, but Nolan
definitely just picked out a Stars Wars toy without ever seeing
Star Wars, he just liked the space ship.


These are my trio of pumpkins that I made the other night.
Their home is on our kitchen table where Nolan loves to stack them
and play with them. Hopefully they'll last through the fall, have already
found some food remnants stuck to them from my very "clean" eaters...kidding!

Hope you liked what I've done so far and for the preview of what is to come.
If you want to come crochet with me, the more the merrier!


Friday, September 30, 2011

The Big Cookie Project: Week 23

Well, I had to be a Miss Fancy Pants this week and try a dainty/difficult cookie. After almost losing a few fingertips, I might not try to be fancy for the next couple of weeks.

This week I was inspired by a "Starry Night" theme that I will be doing for a church luncheon. We had to do some kind of favor for each table, so I decided to do a cookie...duh. I chose a star cookie, with the inside cut out and have the stained glass look.

I felt very prepared, I even read the recipe before-hand, which I usually don't do. The instructions said to take a large chef knife and chop up jolly ranchers and place those bits inside the hole. No problem, but the whole knife thing made me nervous. My solution was to put some jolly ranchers in a plastic bag and then beat them with a rolling pin. Not the best idea with two kids sleeping, but oh well. My first hit didn't do anything but make a huge hole in the plastic bag. Scratch that idea. I guess I'll go with the big knife. But big knife plus tiny candys equals some nicks and cuts. Thankfully, I only got my fingernails a few times, but there were some scary moments when the knife slipped and I could just imagine explaining this mishap at the ER..." I was trying to make stained glass cookies and I cut off a part of my finger."...that would not have been good.
If you venture to do this, here are some tips to make the candy-cutting experience easier:

1. lightly coat the candy with flour, makes it less sticky and easier to handle

2. I tried a lot of different cutting methods: sawing, chopping, chipping....chipping seemed to work best. I thought the candy had to be almost powder-like to melt, but found out that the candy can be in pretty big chunks and will might just fine.

3. Cut a lot of the candy, had a few cookies where there wasn't even candy to fill the holes

Here's the recipe:

STAINED GLASS STARS

Ingredients:

2 cups all-purpose flour

1/4 teaspoon salt

1/2 teaspoon baking powder

1/2 cup butter

1 cup sugar

1 large egg

1 teaspoon vanilla extract

7 ounces (30) hard candy Jolly Ranchers

Directions:

1. Sift together dry ingredients. Put butter and sugar in a bowl and mix on medium speed until pale and fluffy, about 3 minutes. Add egg, mix until smooth. Add flour mixture, and mix until combined. Stir in vanilla. Wrap dough in plastic and refrigerate for about 45 minutes.

2. Preheat oven to 350 degrees F. Roll out dough on a well-floured surface to a little more that 1/8 inch thick. Cut out star shapes. Using a metal spatula, transfer shapes to baking sheets lined with parchment paper. Use a different shape (a smaller star) or use a pairing knife to a cut-out in center of each cookie for candy filling.

3. Sprinkle chopped up candy in a single layer in hole of each cookie, avoiding edges of shape.

4. Bake cookies until candy has melted completely, about 11 to 12 minutes. Do not let the cookies brown, or the candy centers may become bubbly. Let cool completely on sheets on wire racks.


These cookies were a little bit more work, especially cutting up the hard candy, but I have to admit, it gives the cookie a very pretty effect. I hope they taste as good as they look!