Sunday, January 29, 2012

The Big Cookie Project: Week 40

I don't know how many recipes I've done so far with peanut butter and chocolate in it. I guess you could say I'm a big fan of the combination. There's something about peanut butter and chocolate, they go hand in hand, and they are oh so yummy in desserts. Betty Crocker came to the rescue this week. The name of the dessert caught my eye, and I was hooked from there.
PEANUT BUTTER SWIRL BROWNIES
INGREDIENTS:
2/3 cup granulated sugar
1/2 cup packed brown sugar
1/2 cup butter or margarine, softened
2 tablespoons milk
2 eggs
3/4 cup all-purpose flour
1/4 teaspoon salt
1/4 cup peanut butter
1/3 cup peanut butter chips
1/3 cup baking cocoa
1/3 cup semisweet chocolate chips
DIRECTIONS:
1. Heat oven to 350 degrees F. Grease a 9x9 pan. Mix sugars, butter, milk and eggs in medium bowl. Stir in flour, baking powder and salt.
2. Divide batter in half (about 1 cup plus 2 tablespoons for each half). Stir peanut butter and peanut butter chips into 1 half. Stir cocoa and chocolate chips into remaining half.


3. Spoon chocolate batter into 8 mounds, checkerboard style (like picture above). Spoon peanut butter batter between mounds of chocolate bater.

**I used an 8x8 pan, so I have less mounds than the directions said, but it worked.

4. Gently swirl through batters with knife for marbled design (like above).

5. Bake 30 to 35 minutes (I had to do longer since my pan was smaller and brownies were thicker). Cool completely for 1 hour.


They came out really tasty, but I made a huge mistake right at the beginning. I forgot to grease the pan!! In the picture above, you can see how badly they stuck to the bottom, that is why I don't have any good photos of a removed brownie from the pan. Also, HEB didn't have peanut butter chips (shame, shame HEB) so I just used 3 peanut butter cups and chopped them up in to little pieces...mmmm.

Good recipe, great taste!


Happy Baking!


Tuesday, January 24, 2012

The Misadventures of Ms. Mallory

Lately Mallory gives me a lot of laughs. Usually not at that exact moment, but later on when I'm retelling the story. When I told Greg my story his eyes were really big and disbelieving, and then we both started laughing, because it was pretty ridiculous. So, hope this makes you laugh:
You know those moments during naptime or playtime when your child is being incredibly quiet. So quiet, that only two things are possible:
1. They have fallen asleep
2. They are doing something horrible and being sneaky about it
Well, this was a #2 moment.
I laid Mallory down for naptime and didn't hear a peep from her. I raked some leaves, did some chores, etc. About two hours later I hear her calling me, "Mama, mama!" Naptime was over, so I opened her door and saw a disaster. I guess I'll start with Mallory herself. She's sitting on her bed, cute as can be, totally naked from the waist down. I asked her nicely, "Where's your diaper?" Her next words sent shivers down my spine...
"I pooped."
Where was the poopy diaper?!? I started looking around frantically. I found it, and some other incriminating evidence. I've put together the pieces and I think this is what happened...
1. She takes off her pants, puts them back IN the dresser,
2.Took off her poopy diaper, then took a clean diaper, used it as a wipe, cleaned her bottom with it, left it beside the poopy diaper. While in this process pulled out every single diaper from her holder. Had to check that only one diaper was used as a wipe
3. Squatted on the ground and went pee (talented I suppose), then took a clean t-shirt from her drawer to try and wipe it up.
4. Lay back down in bed and look innocent of all crimes.
I should be on some crime show with how I put clues together...haha.
I was a little mad at that moment, but considering how SO much worse it could have been, I guess I'm pretty lucky.


More misadventures of Ms. Mallory to come soon...

Sunday, January 22, 2012

Year of the Yard

I am officially embracing the warmer temperatures (that might be short-lived) by spending some time outside. I started raking the lawn and 5 bags later, I was filled with many ideas of what to do out there. My first goal: Make some grass grow in the bald spots. Lack of rain last summer+3 dogs running around= a WHOLE lot of dead grass and dirt. Our grass is actually the greenest it's been in almost a year; it doesn't matter that most of the green are weeds and winter grass that probably won't last until summer. Next goal:

Do something on this bare side of our yard. Two years ago we had to cut down a tree due to it being diseased and dangerously hanging over our power lines. Then, last summer we tore down our shed. It was practically falling in on itself, rusted out and screaming,"Tetanus shot!!" to our kids. It had to come down, but now there is nothing there. My idea is to make a bed along the back of the fence and fill it with rocks. Why rocks?? Two reasons. One: Because I have so many surrounding my patio that I hate and need somewhere else to put them. Two: The dirt back there is so hard and compact that it would take a miracle for anything to grow. Next, I will put some potted plants along the fence line. Also, some green grass in the big brown area would be great too. Yet again, this was a side effect to our drought last summer.
My final and BIGGEST goal:


Get rid of the rocks! Greg thinks I'm crazy, but ever since we moved in (almost 4 years ago) they have driven me nuts. They can't be walked on in bare feet, they spill out in to the yard and hit you when they get sucked up in to the lawn mower, and basically I just don't like looking at them. This is where all the rocks are coming from for Goal #2. I'm planning on digging them up, throwing them in a wheel barrow and moving them across the lawn. After they are gone, a layer of sand tamped down and then new pavers! I haven't set my mind on which pavers to get, the biggest factor is cost, the suckers aren't cheap. I'm planning on leaving sections of the rock patio dirt, filling it in with compost and making a little herb garden or section for tomatoes.


My hard work (not really hard). The only reason I had to stop at 5 was because I ran out of trash bags.

I'm really excited about my goals. I think the biggest thing I'm shooting for is timeline. I'd like to have it done by Spring Break. We usually plant our veggies by then, and if I wait until summer to do it I'll never get it done in 100+ degree heat. The kids will be gone for a few weekends to their grandparent's house (thank you Mary Kay) so I'm hoping the bulk of my work will get done in this time period. I just need to remember that a little bit everyday adds up to a lot in the end. Wish me luck and I'll keep you posted!


Friday, January 20, 2012

The Big Cookie Project: Week 39

Baked S'mores!!
First off, I am not a member of Pinterest, only for the fact that I could probably widdle away multiple hours a day looking at other people's ideas and creations and think, "I can do that!". But I will admit I go to the website and look at the most popular "pins". I scrolled down and saw this delicious dessert. It is reminiscent of campfires, dark nights and getting to sleep in tents. I had to make them, and PRONTO!
Ingredients:
1/2 cup butter (1stick)
1/2 cup sugar
1/4 cup brown sugar
1 egg
1 tsp. vanilla
1 1/3 cup flour
3/4 cup graham cracker crumbs (7 whole graham crackers)
1 tsp. baking powder
1/4 tsp. salt
2 super sized chocolate bars (5 oz. Hershey's bar)
1 1/2 cups marshmallow creme/fluff
DIRECTIONS:
1.Preheat oven to 350 degrees F. Grease an 8x8 pan and set aside.
2. Mix butter and sugars. Beat in egg and vanilla. Add flour, baking powder and salt. Break up the graham crackers and place in mixer. They will become smaller the longer they mix.
3. Divide dough in half. Press half of the dough in the bottom of the pan. 4. Layer the Hershey bars...yum!


5. Take the marshmallow puff out of the jar, put in microwave-safe bowl and heat for 20-30 seconds. Spread on to the Hershey bars. DO NOT heat in the plastic jar. Safety first people!!


6. This step is tricky....Place the remaining dough in a gallon-size ziploc bag. Use a roller to flatten out the dough to a size that will fit in your 8x8 pan. Cut down both sides of the bag, and peel back. Then, flip the dough over so it is laying on the marshmallow fluff. Then, peel back the other side of the bag. It might get a little sticky, but be patient.


End product! I took it to a meeting at work. Thanks to my wonderful model, Molly.

Here's a side view of the layers. It was REALLY good. So good that it is all gone in one day. The only reason it makes me feel better that it is all gone is that I took it to work, and Greg liked it a lot too. He said it's the best I've made in a while. I'm glad I made it, it will hold me off until I can really go camping and do the real s'mores over a campfire.


Saturday, January 14, 2012

The Big Cookie Project: Week 38

Yesterday was a "pie" kind of day. My cooking started off with a chicken pot pie, and the most horrible 10 lb. bag of frozen chicken leg quarters. Greg bought it (on sale of course) for the purpose of using it in a pot pie. The only problem was I didn't need 10 lbs. in one chicken pot pie, and I didn't want to thaw all 10 pounds. So, Greg had the solution of just running hot water over the bag and letting some of the ice melt and the pieces would EASILY come apart. I did the above directions, but not one piece of chicken budged. Since it was still in the bag I went all "gladiator" on it. If you were driving by my house yesterday you would have seen me throwing this bag of chicken very hard on the driveway...repeatedly. It was a pretty funny scene, but still no chicken budged. I repeated the above process until the chicken was beyond the point of putting back in the freezer, so now I have an abundance of raw chicken in my fridge.
Coming off of my tangent, and back to the important pie of the day...Boston Cream Pie!! I looked through numerous cookbooks trying to find a recipe that contained ingredients that I had on-hand, but was running in to the problem of every recipe needing some kind of nuts (which I didn't have). I DID have all the ingredients for Boston Cream Pie, which seemed surprising to me. I thought for some reason it would have some crazy ingredients since this seemed like a "fancy" dessert to me...maybe it's just me being weird. It's a long recipe due to 3 different recipes: the cake, the custard and the glaze. Enjoy the recipe!
HERSHEY'S CLASSIC BOSTON CREAM PIE
INGREDIENTS:
CAKE:
1/3 cup shortening
1 cup sugar
2 eggs
1 teaspoon vanilla extract
1 1/4 cups all-purpose flour
1 1/2 tsp. baking powder
1/4 tsp. salt
3/4 cup milk
RICH FILLING RECIPE:
1/3 cup sugar
2 tablespoons cornstarch
1 1/2 cups milk
2 egg yolks, slightly beaten
1 Tbsp. butter or margarine
1 tsp. vanilla extract
***Stir together sugar and cornstarch in medium saucepan; graduall add milk and egg yolds, stirring until blended. cook over medium heat, stirring constantly, until misture comes to a boil. Boil 1 minute, stirring constantly. Remove from heat, add butter and vanilla. Cover, refrigerate several hours until cold.
(You really do have to stir constantly, milk will burn on the bottom of the saucepan. When it starts to boil it will get thicker very quick, it surprised me a little bit)
DARK COCOA GLAZE:
3 Tbsp. water
2 Tbsp. butter or margarine
3 Tbsp. Hershey's cocoa
1 cup powdered sugar
1/2 tsp. vanilla extract
***Heat water and butter in small saucepan over medium heat until mixture come to a boil; remove from heat. Immediately stir in cocoa. Gradually add powdered sugar and vanilla, beating with whisk until smooth and of desired consistency; cool slightly DIRECTIONS:
1. Heat oven to 35o degrees F. Grease and flour a 9 inch round baking pan
2. For the cake: Beat shortening, sugar, eggs and vanilla in large mixer bowl untiil fluffy. Stir togethe flour, baking powder and salt; add alternately with milk to shortening mixture, beating well after each addition. Pour batter in to pan.
3. Bake 30 to 35 minutes or until knife comes out clean. Cool completely.
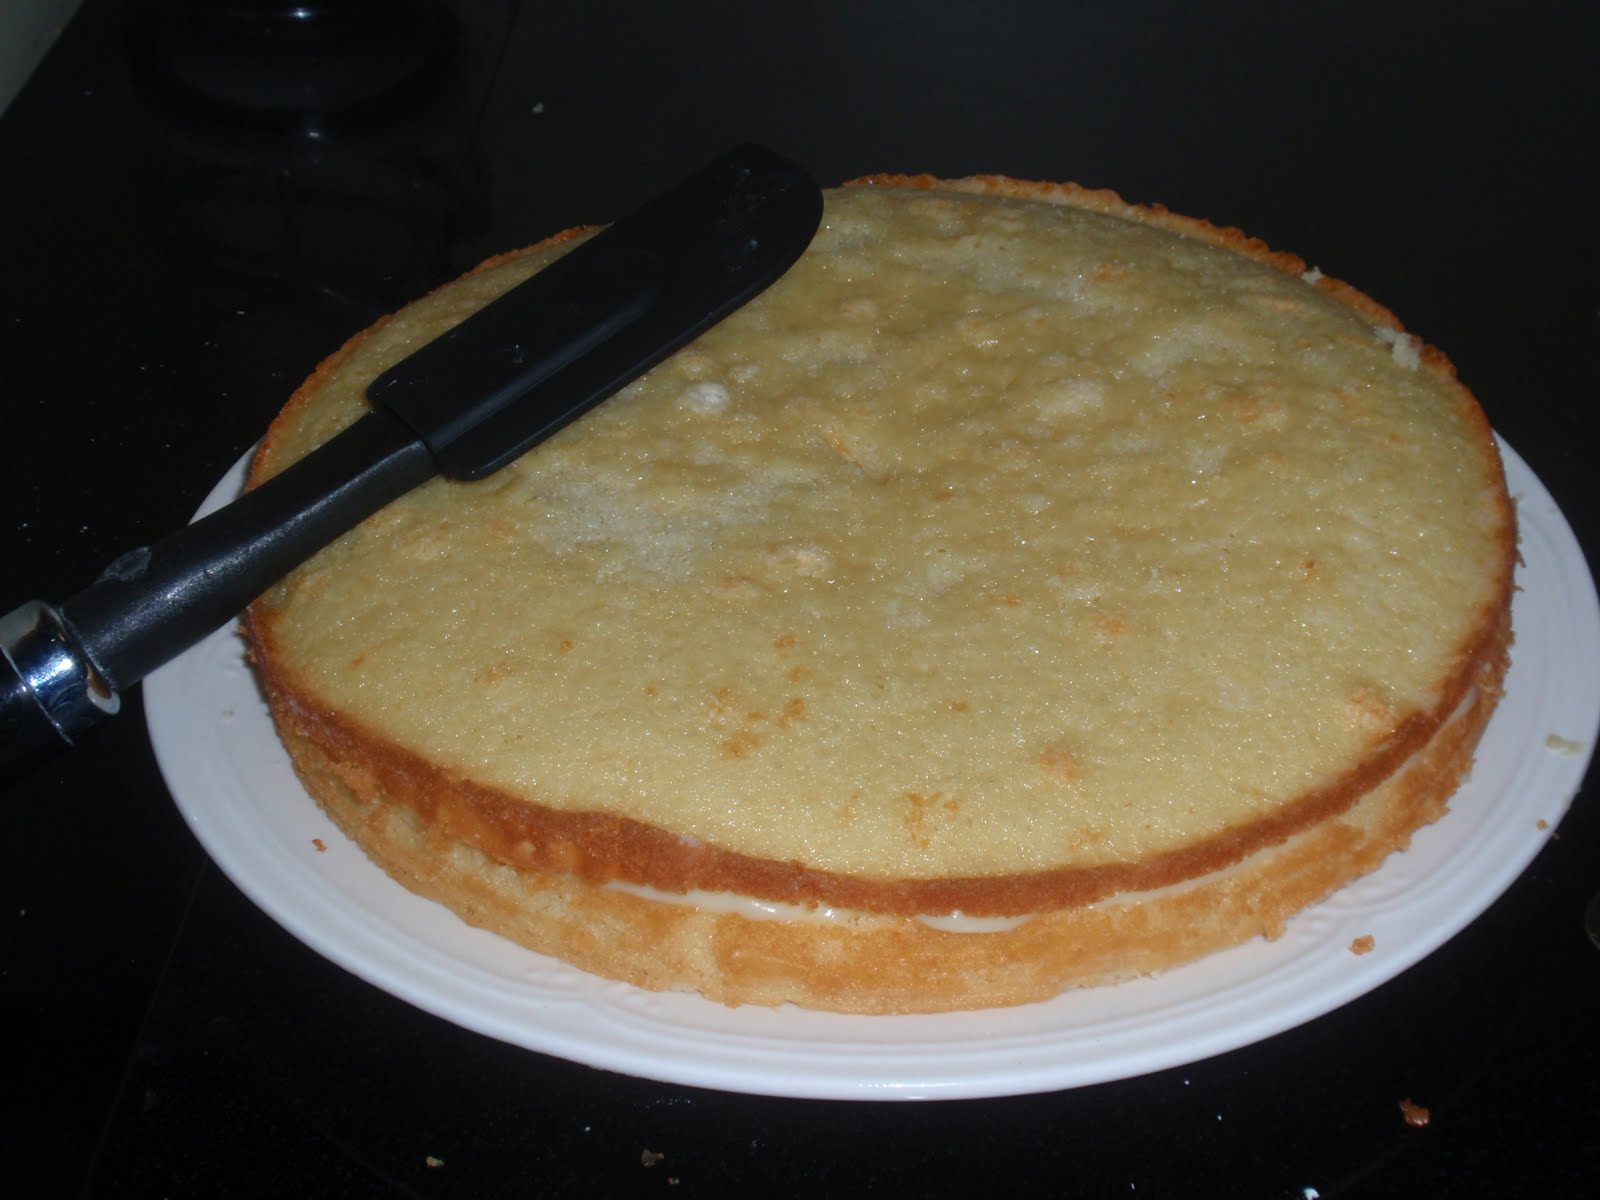
4. With a serrated knife, cut cake in half horizontally. Place one layer, cut side up, on a serving plate; spread with prepared filling. Top with remaining layer, cut side down. Spread the dark cocoa glaze allowing glaze to run down sides . Refrigerate several hours or until cold. Refrigerate leftover pie.


Here's the end product!! I had a little spillage with my glaze, but somehow it mysteriously disappeared when Greg entered the kitchen. The glaze tastes exactly like the stuff on a chocolate covered donut, it was pretty good. All 3 components tasted okay separately, but together they tasted great! If you've never done this kind, you should definitely try it!


Happy Baking!


Monday, January 9, 2012

Zigzag Blanket!

I was looking to break up the monotony (sp?) of just making hats over the Christmas holiday. I thought maybe some kind of blanket sounded great and cozy. And making it a baby blanket kept it manageable. I found a zigzag (or ripple) crochet pattern online.And of course, since we live in the Land of the Aggies, I made the blanket with white, gray and maroon yarn. There's something about making a blanket and watching it take shape. The first row that you do, it just a thin line of yarn and then every row after that, it takes on a little bit of shape. Especially with this zig zag pattern, I was very worried that it would not be very zigzagy and sort of just straight. But the pattern worked really well and it stayed like it was supposed to the whole time. The only hiccup that I encountered was that I ran out of maroon yarn with only 2 more rows to go. The blanket took a hiatus for a few days while I slowly got around to going to Joann's for more yarn.

The pictures don't do the maroon justice. It seems almost black in the pics, but is a maroon in real life...I can never figure out the right settings on cameras.


Here's the link to the crochet pattern: http://crochet.about.com . It gives you a whole list of ripple patterns to choose from.


Of course, this is for sale for a little future Aggie :)

Sunday, January 8, 2012

The Big Cookie Project: Week 37

I got the privelege of making the dessert for Carrie's wedding luncheon. I was looking for something interesting and started looking through some dessert magazines. Didn't want anything too chocolatey or rich since it was just lunchtime. Found it!! They are called Dulce de Leche Bars.

Recipe:

Ingredients:

2 cups all-purpose flour

1 teaspoon baking powder

1/2 teaspoon salt

1 cup sweetened flaked coconut

1 cup chopped pecans

1 1/2 cups brown sugar

3/4 cup butter, melted ( 1 1/2 sticks)

3 large eggs

2 teaspoons vanilla

1- 7.5 oz. jar marshmallow fluff

1- 13.4 oz. can dulce de leche

Directions:

1. Preheat oven to 350 degrees F. Spray a 13x9 pan with non-stick cooking spray.

2. In a mixer, stir brown sugar and melted butter. Add eggs, one at a time; stirring after reach addition. Stir in vanilla. Stir in flour, baking powder and salt. With a spatula stir in coconut and pecans; stir until just combined. Spread batter in prepared pan and bake for 20 to 25 minutes or until golden brown.

3. Immediately remove bars from oven and spread with marshmallow fluff. Drop teaspoons of dulce de leche on top of marshmallow and swirl with a knife.

4. Cool completely and refrigerate until chilled; cut and serve.


These are what the bars looked like right out of the oven with marshmallow spread on top and the dollops of dulce de leche. Dulce de leche is just fancy for caramel. Haven't swirled yetHere are the toppings for the bars. I actually had to put the dulce de leche in a bowl and heat it in the microwave to become a creamier consistency. Seemed very thick out of the jar. It was much easier to spread after I had heated it up.The finished product with the bride-to-be. It was fun spending the day with Carrie right before she got married. Two things that I love to do combined in to one day: family and baking :)


PS. It was really hard to not eat the marshmallow fluff right out of the jar....REALLY hard.

Sunday, January 1, 2012

The Big Cookie Project: Week 36

The rules that I made up 36 weeks ago have basically been thrown out the window. I told myself I wouldn't fix any bar cookies (anything from a 9x13 pan). Well, these caught my eye and now I have broken another rule. I'm revising the rules and making two guidelines:
1. It has to be classified as a dessert
2. It needs to sound delicious :)
I WAS going to put that it needs to be baked, but there are some no-bake recipes that I would like to try. Why tie myself down to an oven?
So, this week another great pairing caught my eye. A few weeks ago, I chose a classic pairing of peanut butter and jelly. This week I went with salty and sweet. This recipe contains chocolate chips AND pretzels! Mmmmmm.....
CHOCOLATE CHIP AND PRETZEL COOKIE BARS
Ingredients:
2 cups all-purpose flour
1 teaspoon baking soda
1/2 teaspoon salt
1 1/2 sticks unsalted butter, at room temperature
1 cupt light brown sugar
1/2 cup sugar
2 large eggs
2 teaspoons vanilla extract
12-ounce bag semisweet chocolate chips
1 1/2 cups mini pretzel twists, coarsely chopped
1/4 cup chocolate chips, for drizzling (optional)
1/4 cup peanut butter, for drizzling (optional)
1/4 cup pretzels, crumbled, for topping (optional)
Directions:
1. Preheat oven to 350 degrees F. Spray 9x13 pan with cooking spray.
2. In a mixing bowl, combine butter and sugars until fluffy. Add eggs and vanilla extract. Mix in dry ingredients. With spatula stir in chocolate chips and pretzel pieces.
3. Spread batter in the pan and press down with a spatula. Bake for 30 minutes or until golden brown.
4. Drizzle on melted chocolate, peanut butter and sprinkle pretzel pieces on top if desired. Let set and cut in to squares (32 squares).
**from www.browneyedbaker.com
They did turn out pretty delicious. I've been missing the bar desserts in my life for the past 36 weeks, and I'm glad I started with this one.
On a side note: I thought I should let you know a BIG goal of mine. I do some crocheting on the side and have been saving every penny. Greg keeps on bugging me about what I want to do with the money. It's really not that much...but I needed a goal to work towards. So, my goal is to get a new convection oven! Very excited, I'm hoping to get it with some time left in my Big Cookie Project. I'm afraid if I get it after, I might be burnt out on making cookies for awhile :) Another note: We made it through our first Lady Aggies Basketball game! We went with Nolan's bestie and we had a great time. We did have to buy a few bags of M&Ms but it was a great night. My goal next time: I thought it would be super cute if they made the "Kissing Cam"....just a hug or a peck, but it would be really sweet!

Have a blessed week friends!